
Amazon shows you how to make your own Amazon Echo using Rasp
The Amazon Echo is a nice little device, but you probably didn’t want to pay hundreds of dollars more for something your phone could already do — being a voice-activated assistant. But if you’re a developer, engineer, tinkerer or someone who is just curious, you’ll be happy to know it’s possible to make your own Amazon Echo.

The project involves the use of a Raspberry Pi prototyping board and a bundle of everyday computer peripherals, cables and accessories you probably already have in your home. Here’s the full list of materials:
Raspberry Pi 2 (Model B)
Micro-USB power cable for Raspberry Pi (included with Raspberry Pi)
Micro SD Card – To get started with Raspberry Pi you need an operating system. NOOBS (New Out Of the Box Software) is an easy-to-use operating system install manager for the Raspberry Pi. The simplest way to get NOOBS is to buy an SD card with NOOBS preinstalled
An Ethernet cable
USB 2.0 Mini Microphone – Raspberry Pi does not have a built-in microphone; to interact with Alexa you’ll need an external one to plug in
A USB Keyboard & Mouse, and an external HDMI Monitor – we also recommend having a USB keyboard and mouse as well as an HDMI monitor handy if for some reason you can’t “SSH” into your Raspberry Pi. More on “SSH” later.
WiFi Wireless Adapter (Optional if you want your unit to be used Ethernet-free after setup)
Of course, you also need the technical know-how to setup and use the Raspberry Pi, virtual machines, Java and other developer-centric software tools in order to get to the point where you can install Amazon’s Alexa voice service onto it, but they offer up a pretty detailed explanation of how to go through all of that if you’re a bit new to it all.
Oh, and your device obviously won’t come close to the level of beauty that can only be achieved with precision engineering (unless you happen to be a world-class designer and manufacturer all in one), but it’s yours, it’s affordable, and you can do whatever you want with it. The instructions are at Github right here if you’re interested.
 AT&T could be getting a
  Google announces UK availabi
 HTC teases BoomSound on the
  Motorola offering free Moto
 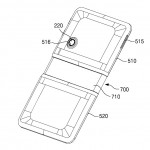 New Samsung patent shows a s
 Google Maps error causes dem
 HTC 10 leaks in another phot